This separate section of the blog is dedicated to both test animations and progress on the final thing before the final product is shown at the very end.
This is attached to the blog that handled the general rigging and weight painting process.
3D character animation portfolio – Bloggers Unite (hulldesign.co.uk)
Blocking out the environment
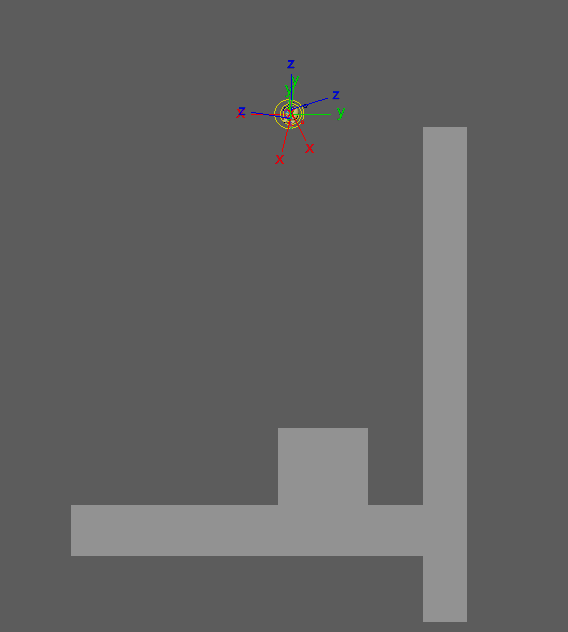
Before work on the animation itself could begin. The environment where the animation would take place would be blocked out as to get a rough sense of scale for the area. This would be started using an initial floor plan, to get a rough template of how big the area should be, ensuring that there is enough room so that not only would Urti be able to walk comfortably, but also so that the camera has plenty of angles to fit around as well.
The model was brought into the area as a sense of scale as to make sure everything was the correct size when both making and adding objects to the scene (mainly in making sure everything seemed to make Urti as small as possible, given her relatively short height). I decided to position a camera and label it as a “progress report perspective” so that I could always take a print screen of how much progress I was able to make on the project, below is a video showcasing most of the progress in creating the environment from that camera angle.

I chose to decorate the hallway with both a custom texture used for the walls the door, as well as several picture frames and cobwebs. The picture frames scattered throughout the environment are actually personal works of mine from years past that I chose to edit and distort before placing them into these picture frames, giving them a new purpose. The rest were handled with flat colours (like the ceiling and the floor).
Test render
Before proceeding straight away with the animation, I decided to create a little test render, in the form of an actual thumbnail that could potentially be used alongside the animation itself.
I took the model and moved it into position, using the same camera I used to document the progress of the map layout as a camera angle to use for the test render. Whilst Urti was in position, I did encounter a slight hiccup in terms of the lighting, mainly in it being far too dark for the shot, that and for whatever reason, it wasn’t properly rendering the transparency within the textures themselves, causing the transparent parts of the texture to show up as completely black.
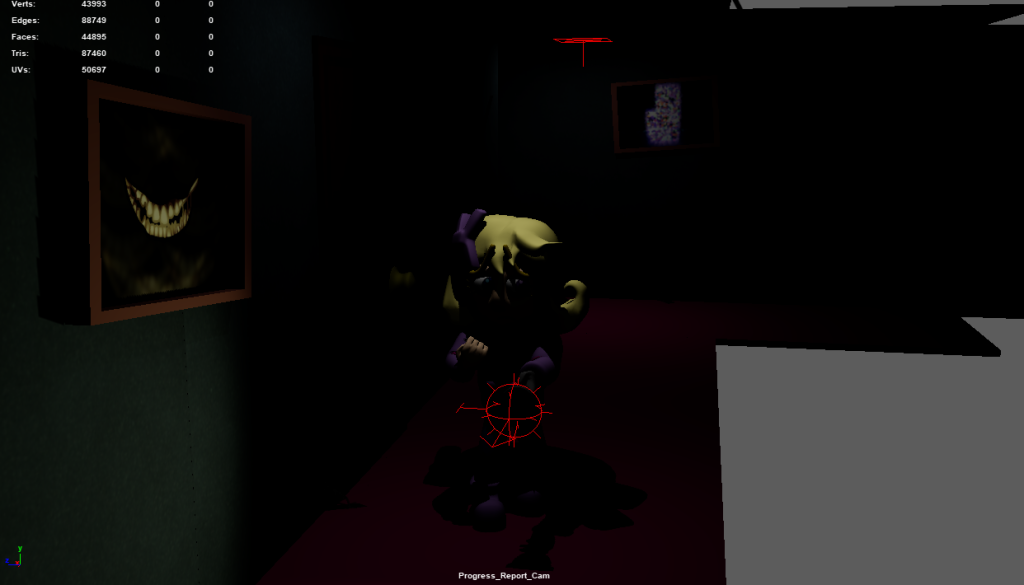
Turns out, the way to fix the issue resulted in a separate overlay copy for each of the textures due to how arnold works. That and for whatever reason, the light that the flashlight was using, wasn’t showing up within the test render at all.
After a bit of tweaking and messing around with the lighting and files for the textures, I managed to fix up the lighting, and finally proceeded to do a test render.
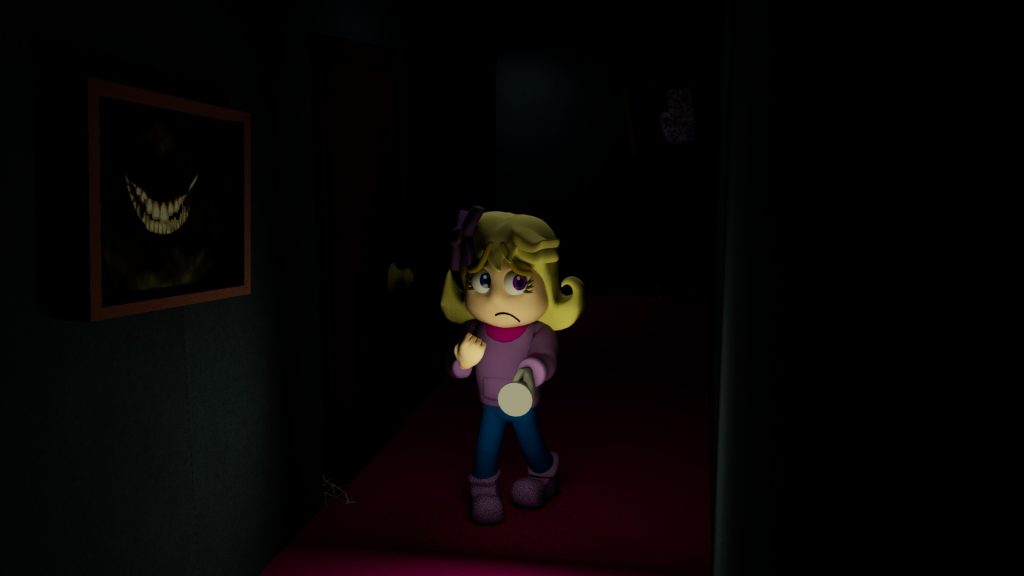
Overall, I was very happy with the result, since not only was the lighting now fixed, but it was at a level that I was now satisfied with how it looked overall. When initiating this render, I did have the render settings at a higher value I probably should have (as whilst the final render did look nice, it did end up taking well over 15 minutes for a mere test render).
Story boarding
This part of the process was relatively straight forward, since the main focus of the animation, is based off transforming this pixel animation I made several months prior into a full 3D animation.

This would be the basis of one of the animation segments, essentially bringing the 2D animation into a 3D like environment (with some additional bits of movement along the way as to give it a bit more of a unique flavour, and to stretch out the duration a bit more, since the pixel animation is only about 10 seconds).
Test animation #1 – Basic Walk cycle
This first test animation was done before any blend shapes + texture modifying for the eye’s and mouth were implemented, since the test animation was focused primarily on limb movement.
This animation only served as a rough purpose to see how well I could replicate a generic walk cycle, using this video as a reference guide on how to do so in a simple fashion.
After several minutes of adjusting, this was the result that I was able to come up with, composing of a simple generic walk animation on a grey platform to represent the floor.
Whilst the timing is off in one step taking noticeably longer than the other one, this test was mainly done to just get down the general movement of a walk cycle, whilst also checking how lenient the controls should be around the hips (which when testing, I found out was too much, and decided to restrict it just a bit more to ensure that the hips would not cause too much deformation due to how much they were moving.
I also noticed that in certain parts of the animation, that parts of the model were clipping through each other, so I could use this as a way to go back to the weight painting and tune up those areas.
I considered this animation a step in the right direction (ironic since its a walk cycle), though improvements are definitely needed.
Test Animation #2 & #3 – Flashlight rotation & flashlight navigate
Test animations 2 & 3 were done as a way to test how the light would interact around the environment.
Test animation 2 was of a simple back and forth animation where the flashlight moved in-between 2 set rotations to show its effects on the floor of the environment.
Test animation 3 is a lot more elaborate in terms of being a test animation. The test has the flashlight floating through the hallway by itself as it looks at various objects briefly. This is a very rough layout of how the final animation will be, since Urti will be using the flashlight to look around the environment and examine her surroundings.
I plan on using this test as a frame of reference for when making the final animation for the assignment, as well as to adjust the intensity of the lighting for both the flashlight, as well as the natural light within the environment itself (mainly so that the whole thing isn’t just completely shrouded in darkness 24/7).
Segment 001
The animation would be split into several different segments, as to make it easier to manage, as well as making small fixes when needed (essentially it’s way easier to re-render a segment of an animation due to a slight error, and not the entire animation because of said error).
Segment one would consist of Urti peaking into the environment through a door, pushing the door open, and slowly walking into the environment, before the door abruptly slams shut behind her, causing her to jump and turn to the door behind her, with her head shaking. The camera would follow roughly where she would walk, and would pan towards the door when it slammed shut.
In terms of principles, I experimented with squash & stretch, anticipation and exaggeration.
Segment 002
The second segment would closely follow the original pixel animation that I had made back in October 2022, consisting of Urti approaching the hallway from the left, and walking to the right side, stopping when the door creaked open, turning around top investigate, only to jump and flee when the door slams shut.
I wanted to ensure that I would stay true and fateful to the original 2D version, since this is the main reference image that I was using for the basis of all of the different animation segments.
Granted there are of course a handful of subtle differences due to the translation from 2D to 3D, but overall, I think I managed to recreate the original piece within a 3D environment.
In terms of principles, I experimented with squash & stretch, anticipation, exaggeration, lighting, and some secondary actions (ie, when Urti jumps, all her limbs sprawl out wildly in shock, etc).
Segment 003
The third and final segment was something that I initially wasn’t sure on what to animate. I had multiple ideas that I wanted to animate, yet I wasn’t sure as to which idea to go with. Though I eventually decided on a simple segment where its from the perspective of the room that Urti looks into, before chickening out and moving onto another part of the environment, unaware that a painting just out of sight has some paranormal properties to it, and right as she wonders off, the painting changes its picture to be much more sinister.
This one whilst admittedly more basic in comparison to the other 2 segments, was primarily more meant to be like an experiment in both a fixed camera position, as well as manipulating the environment a little more (in that 2 of the paintings were moved from their original position into the room, with a quick transition animation when the 2 were swapped.
Whilst fewer principles were used, staging I would say was still used, mainly in how despite the light being more towards where all the movements, having the painting wonder just in the darkness within the peripheral vision of the camera.
Rendering issues
When all 3 scene’s were made, I brought up a tutorial I had followed in the past that I used back during the 3D asset design course, which goes through the process of setting up a render sequence in Maya.
I followed the tutorial like usual, and set up the sequence to begin the render, using the settings of 4/3/3/3/3. It was after this set up however, that problems rose when attempting to render the sequence. Maya would render the first 2 – 3 frames, before suddenly crashing without displaying any form of error message.
This was strange to say the least. I tried again, and the same thing would happen, it would render the first 2 – 3 frames, and it crashed again afterwards. I tried messing around with the settings in hopes of fixing the issue but with no success. The farthest I managed to get with it rendering was 5 frames before crashing on the 6th. Settings were changed from lowering the quality, to changing how many warnings, to starting the render half way through instead of at the beginning, to even attempting to render the sequence in PNG’s instead of TIF’s. None of the changes made ever managed to fix the issue, so I continued my attempts, and searched around for answers on various forms.
Every site I searched only had solutions for similar problems, but not the exact one I had encountered, which did not help things in the slightest.
The last attempts at getting the render sequence to work were performed on May 11th (by that point, I knew it wasn’t going to finish in time at all, I just wanted to see if I could at least still get something out it). However, the attempts only gave the exact same results, with it crashing after rendering 2 – 3 frames.

Conclusion
Overall, I am rather proud with the results that I was able to achieve with the animations. Whilst I am disappointed in Maya’s faults for being incapable of rendering the scene properly at all, the progress I have made does make me interested in trying more animations with specific actions within the future.
If I was to go back and remake these scene’s, I would attempt at making the lighting across the environment just a little bit brighter, since in the showcase videos for the animation when lighting was enabled, it became almost pitch black at times, making it difficult to figure out what was going on.
Video references
Doodley (2023) Animating LEGS (Walk Cycles and Weight) – Doodley [Video] Available Online – Animating LEGS (Walk Cycles and Weight) – Doodley – YouTube [Accessed 21/04/2023] Fig.01
Academic Phoenix Plus (2021) How to Render High Quality Video in Maya (Basic) – Academic Phoenix Plus [Video] Available Online – https://youtu.be/8ht_Gp6P9DY [Accessed 12/05/2023]