This portfolio covers the entire process of the 3D character animation course from start to finish, documenting the general process, the techniques used to produce the final result, and all of the technical aspects and hiccups that happened along the way.
There is a seperate blog for the various test animations, creating the environment, and the official animation segments (in which Maya was not cooperative at all).
Making the scene + Test animations – Bloggers Unite (hulldesign.co.uk)
Storyboarding
Before heading straight into the process of 3D character animation, storyboarding was first done as to not only come up with concepts for potential animation, but also to figure out what potentially could and could not work with the character, as well as figure out what would be possible within the 12 weeks that this module would be running for.
Out of all the idea’s that I thought of, there were 2 I had in mind, in terms of making them into animations (Though technically, one of them was already made into a 2D animation). The first of these idea’s has a story board as depicted below.
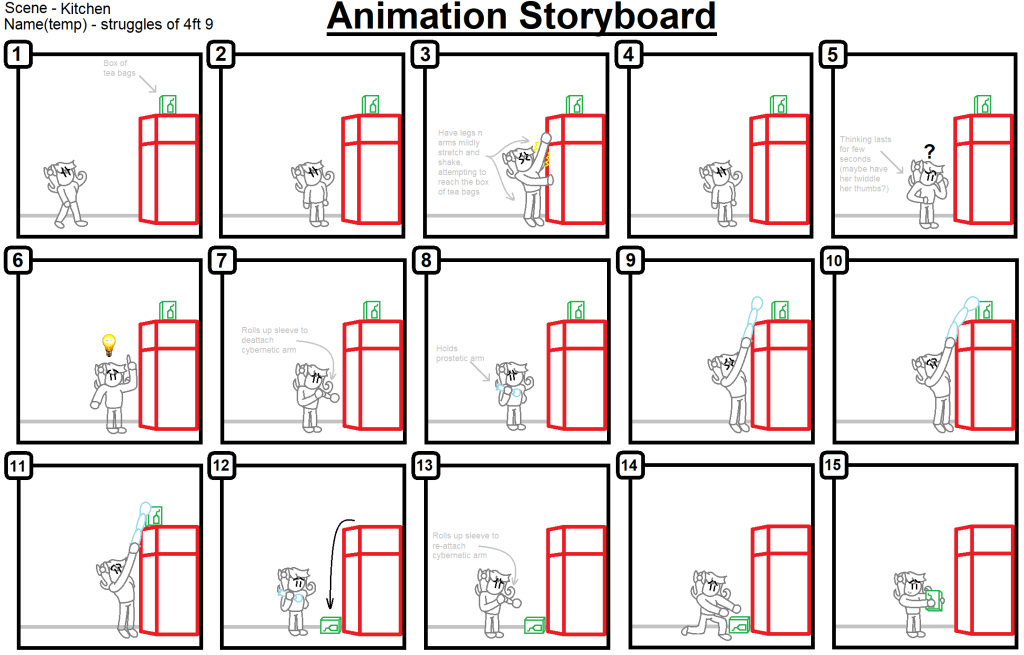
This 15 panel story board, depicts Urti struggling to reach a box of tea bags that have been placed on top of the fridge, before getting the idea of removing her cybernetic arm to use as a way to extend her reach, and knock them off the fridge within reaching distance.
This animation would play not only on several principles of animation required for the module, but also shows a scenario in what Urti would do, given her short height of only 4ft 9.
The other idea I had in mind for making into an animation, is based off of one of my personal works made back around September of 2022, with this 2D pixel animation that I made through the use of pixel studio. The animation composes of Urti walking down a dark hallway only to be frightened by a door opening and then subsequently slamming.

Ultimately, after thinking about both potential idea’s, the decision was made to go through with the storyboard one as opposed to the pixel animation one, mainly since it would allow me to experiment more in terms of the principles of animation, but as well as experimenting in an animation where the cybernetic arm is removed.
However, down the line, I changed my mind on the decision, and went back to the 2D animation that I had done earlier, using that as a rough reference of the area that I would make the animation in, and how the animation would go.
Now with the animation storyboard craft and selected, it was time for the next step in terms of animation.
Rigging
The next part of the assignment, involved setting up a skeleton rig for our model. For a brief explanation, rigging is the process of giving a model (It can be any model, not strictly just characters), a skeleton structure that allows it to naturally move and interact with the objects around its environments. Think of it as like a puppet on strings in a sense, you want the puppet to move in a specific way, and the strings allow you to control those movements however you please.
In week 2 we were given an assignment in practicing a walk cycle, with a pre-rigged model for us to look at and play around with. Whilst initially, progress was slow due to me not working with rig’s before, after some time and modifications, as well as constantly adjusting the rig in terms of performance and movement, this was the result that I ended up with.

Obviously more practice would be needed, but with time and practice, this would be something that I would refine and improve overall later on down the line.
In week 3, we were taught the fundamentals of FK and IK rigs, along with being tasked to perform each of these rigs, to a simple lamp that was provided to us. These kinds of rigs and knowing the differences between them would be critical when it would come to the next step in terms of 3D character animation. Below are some demonstration’s of each of the handles in an animated form.

The first type of handle we were tasked with constructing, was of an FK handle. FK’s are useful in making precision based movements, since the user has control over each individual part of a joint (so for example, in a leg, you would have the thigh, the knee, the bit below the knee, and then the foot itself). FK is essentially useful for more in terms of animations in the rotation side of things, since the user can make the motion as either fluent, or stiff as needed to be. This can be useful when animating robotic characters, or machinery that is generally stiff and precise in movement.

The other kind of handles that we were taught, are IK based handles. IK’s are more useful in making natural like movements, like those seen typically by human like characters. These kinds of rigs are usually controlled by the end piece, like a hand or in the example GIF provided, the head of the lamp. An additional control like shown here with the green ring in the back, may be used to bend the joints in a desired location if need be.
Both FK and IK can be used in combination to achieve movement in specific scenario’s. Doodley in a video explaining both of these kinds of animation styles, gives a great example where the two styles can be used together to give both fluent motion, as well as good general animation when performing the specific action in his demonstration.
Knowing which one to use when it is needed, will be critical when it comes to animating your character both in a fluent as well as natural manner, depending on what character it is you are trying to animate.
Setting up the rig
Now armed with the knowledge in terms of both IK and FK rigging techniques, it was time to apply them to my character.
As per usual, this would be done in a separate save as to ensure that in the event of a mistake, the original file would not be lost.
Since this would be the first time I would be setting up the rig for a human character, I asked around if anyone happened to know any good tutorials for beginners on how to rig a human characters. Luckily one of my peers, when I enquired about it, sent me a pair of links regarding a character rigging video for beginners, which I was thankful for.
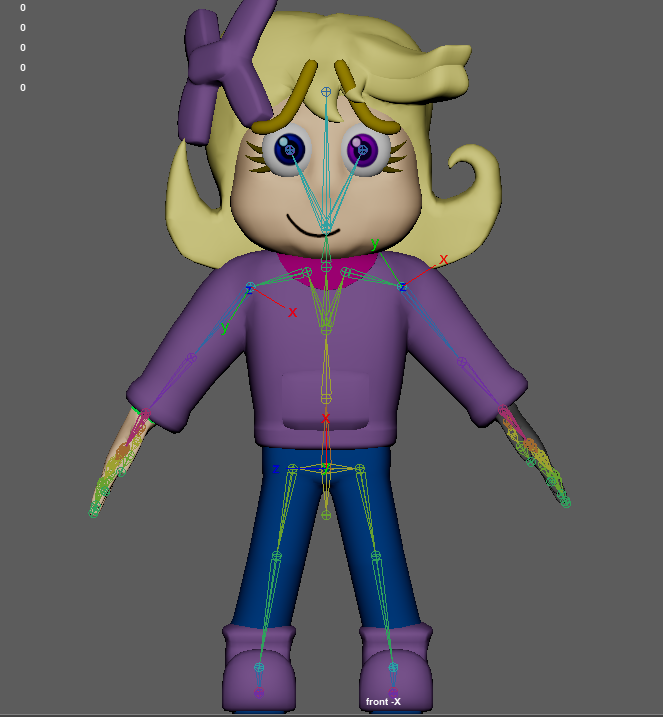
With a tutorial in hand, it was now time to begin the construction of the skeleton for Urti’s character model.
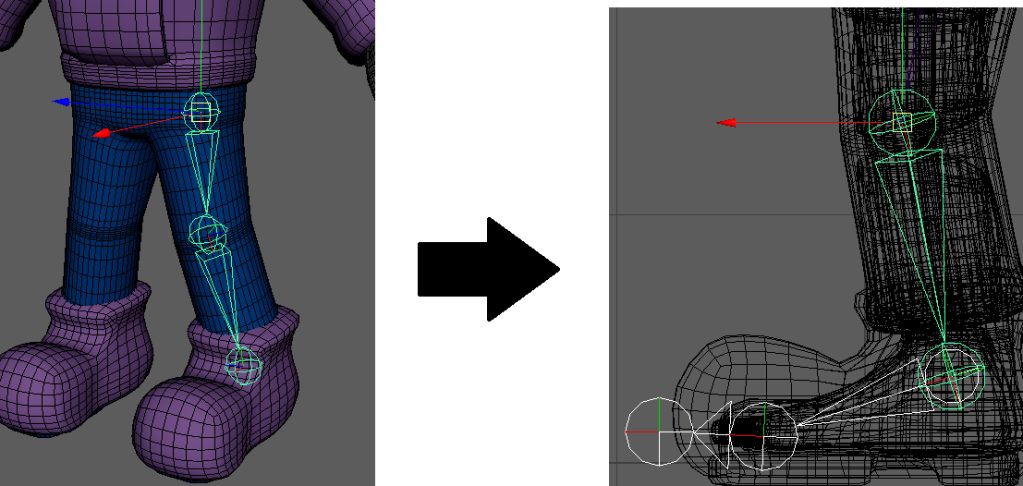
Construction started on the left leg, starting at the thigh, and working my way down the ankle, before making a separate part of the skeleton for the foot and connecting the two together into a single single joint for the sake of simplicity later on down the line.
The tutorial was followed closely, as to ensure that I didn’t make any critical mistakes that could potentially mess up the models skeleton, and cause horrific deformation later down the line. Granted some parts had to be innovated down the line due to my design choices
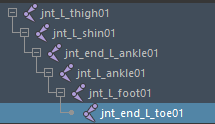
Each joint was also given a name under proper naming procedures, as so that not only it would be organised and look professional, but also so that each joint can be referred to easily without many potential mishaps. Each joint would have its name start with “jnt” as the tutorial states, for consistency and clarity.
Next according to the tutorial, an IK handle be added to both the thigh and the end ankle joints, this would establish the IK handle, and allow the leg to move fluently as shown below in this test GIF.

Whilst the rig was barely in any form of functional state, I was quite happy with the progress that I was able to make so far in terms of setting up the skeleton for the model, even if it was all of a single skeleton leg.
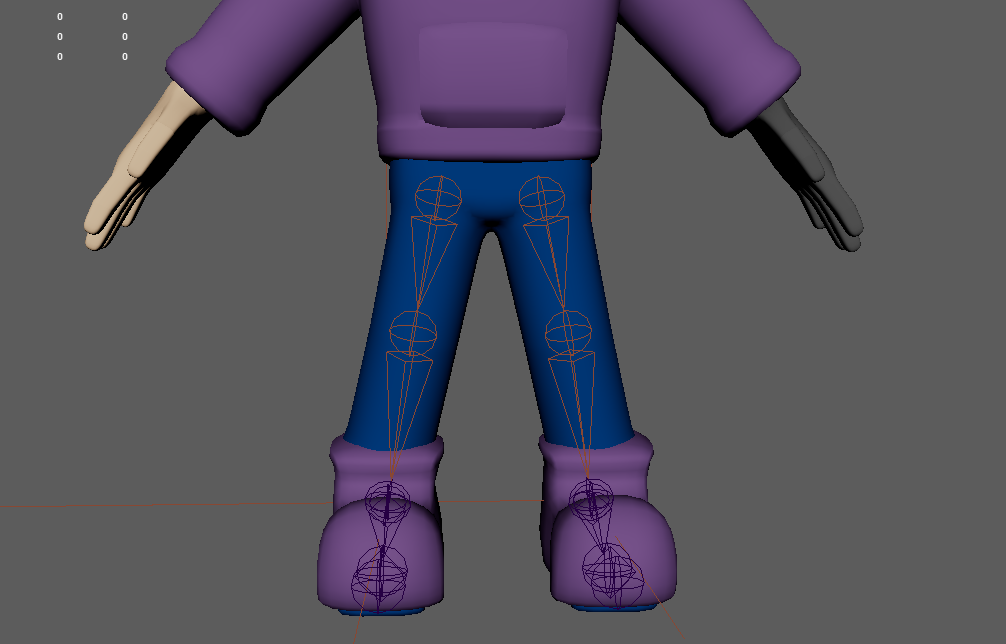
Next, the progress we did would then be mirrored onto the other leg. This would be done to both save time, as well as not having to go through the process of making an identical leg skeleton and risk it not being as precise as the other leg for the sake of consistency. The names of each of the joints were also changed and altered as to match the correct leg, and avoid consistency issues later on.
Then, after checking with the tutors to make sure that the naming conventions were appropriate, they provided that whilst they were in the right direction, they weren’t properly done. This was luckily done at a stage where there not that many joins added to the rig as of yet, so renaming all of the joints only took a few minutes.
Next, a locater was used to exactly pin point the positions for both the root bone as well as where the neck would be (Though given the fact that Urti’s character model does not possess a neck, it could potentially have some problems down the line with the tutorial that I am following).
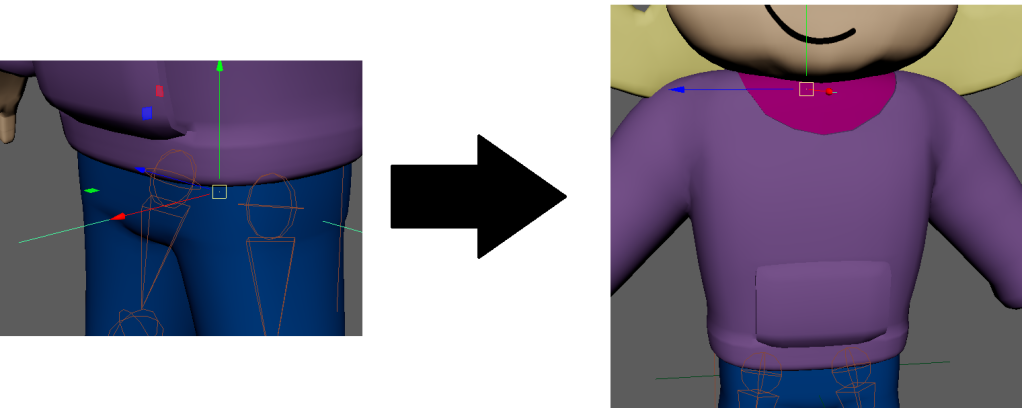
Then the spine structure was linked up to the legs accordingly, making sure that each of the points that were linked up shared the same pivot (For if they didn’t, it would result in the character potentially wobbling when doing basic movement).
The pelvis is then added, and then is linked to the spine using the same method as before. Now that the parts were connected, we now had a pair of legs, and a spine as our structure for the rig so far, progress was coming along nice and smoothly.
Next came the rigging of the left arm of the skeleton, along with each of the individual fingers on the left hand. Because this involved connecting the arm in a way to ensure it was properly attached to the model, some parts of the model had to be hidden as so that I could properly see where the joint needed to go.
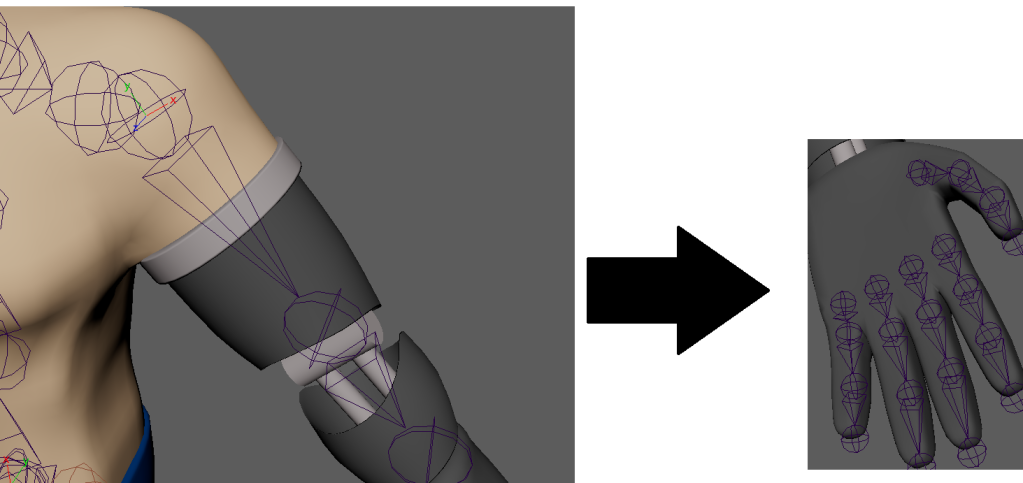
Then, once each of the joins were named accordingly (which took quite some time given how many of them there were). Each of the fingers and the thumb, were then connected to the wrist, to fully form the skeletons hand.
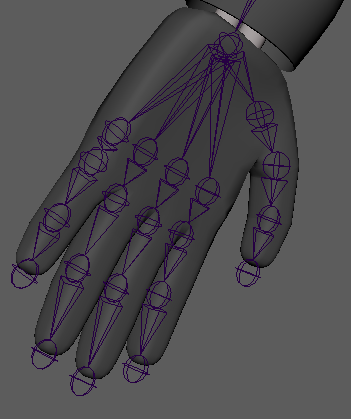
This process would then be mirrored over to the hand for the same reason as before, saving time in not having to remake the exact same limb again, but for the other side.
With the rigging process almost complete, it was now time to finally add in the functionality for the eyes onto the rig.
There was a minor hiccup when it came to setting up the rig for the eye’s, since neither of them were exactly perfect sphere’s, so when rotating them, it did make the eye model look a bit odd when the eye’s turned in certain directions. This was fixed by slightly adjusting their size, and then applying the skeleton accordingly.
Skin was then also bound to the eye joints, which were then applied to the eye and then hair parts of the model. Progress was coming along very nicely, and the model was starting to take shape.
The rest of the process was then applied to the head, given that the head was made as a separate part of the model from the body, and no neck exists to connect the head to the body. Thus it would be useful in avoid any form of deformations around where the “neck” should be, which also put down my worries in thinking something would go wrong around that area, since the tutorial modified things around the neck, when my model did not possess one.
Now it was finally time to start the skinning process, and refining the model for animation. First, the general skin binding was applied throughout the entire model, so that then we can take a look at how that translates into the models general movement, and see how that goes.
When checking the model for any sign of deformities, some did show up when moving the legs and arms, though surprisingly not as much as I thought things would deform at. The only main concern that I did notice after applying the skin, was that the right arm (our left), ended up turning green, though this was easily fixed by reassigning the material back to itself.

Controls were added both to the feet and hands, as to make them easier to locate, as well as control the animations for the model when needed (as opposed to just constantly going into the skeleton folder and grabbing the IK handles every time).
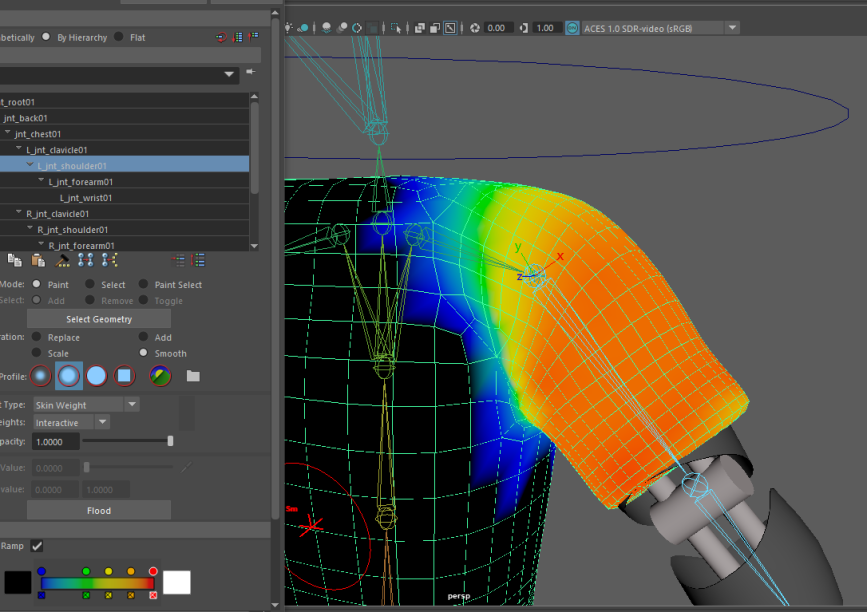
Then came to the tedious task of weight painting… Oh boy way this quite the struggle to get things right.
Weight painting to put a long story short, is essentially how much influence a certain joint has over certain parts of the model, and is mainly used to ensure that the model is being animated without heavy deformation and excessive stretching beyond what would be considered standard.
To properly make sure everything was held together and looked okay in animation, one would traditionally use the control handles on the model to move parts of the rig around to see what parts look ok, and what parts need to be adjusted. This becomes especially apparent around joints, or if the model in question has a lot of tiny details that either need to move alongside general character movement, or barely move at all.
This process would have to be done carefully, as to make sure every moved and bent the way it should, and to avoid parts clipping (or at the very least, make there be as little clipping as possible).
The forearm and wrist area of the metal arm were also granted full influence, as to not only still allow them to move, but to also prevent them from bending, which is what I didn’t want it to do.
The first stage of weight painting was generally just to clean up the influence across each of the joint’s, just making sure that the movement of each of their respective joins only influenced what was needed, reduce overall general clipping, before moving into the stages where we get to
This would be like all parts of weight painting, a test of mostly trial and error, moving the various handles into different positions and angles, seeing which area’s deformed in what ways and why. This would be to ensure that I can get as many potential movements as possible whenever they are needed.
This part of the process was smooth sailing for the most part, with the only part of the model giving me a bit of trouble, being the right foot, which has a noticeable deformity when moving it in certain ways.
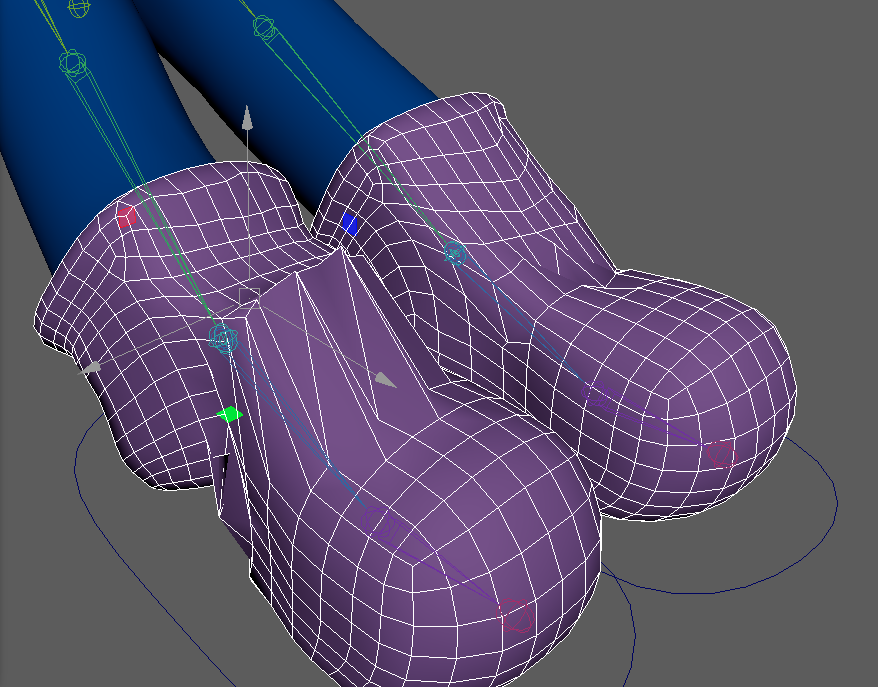
Granted this was easily fixed by having both feet lined up so that when the left one was fixed up, the same steps could properly be applied to the right one, and have it look natural, even if it did take quite a bit of tinkering in general.
With the main parts fixed up, it was time to start tinkering with the more fine parts of the model, specifically, the areas that have a lot of clipping, and the hands (since the animation piece that I planned, does involve Urti grabbing a specific object).
The metallic arm was given the full influence value of 1, as so that it would not show any form of bending or deformation at all (Minus the hand). The same however was not done for the leg, since the metallic leg would be obstructed completely by the pants, and thus outside of clipping issues, would not need to be adjusted much.

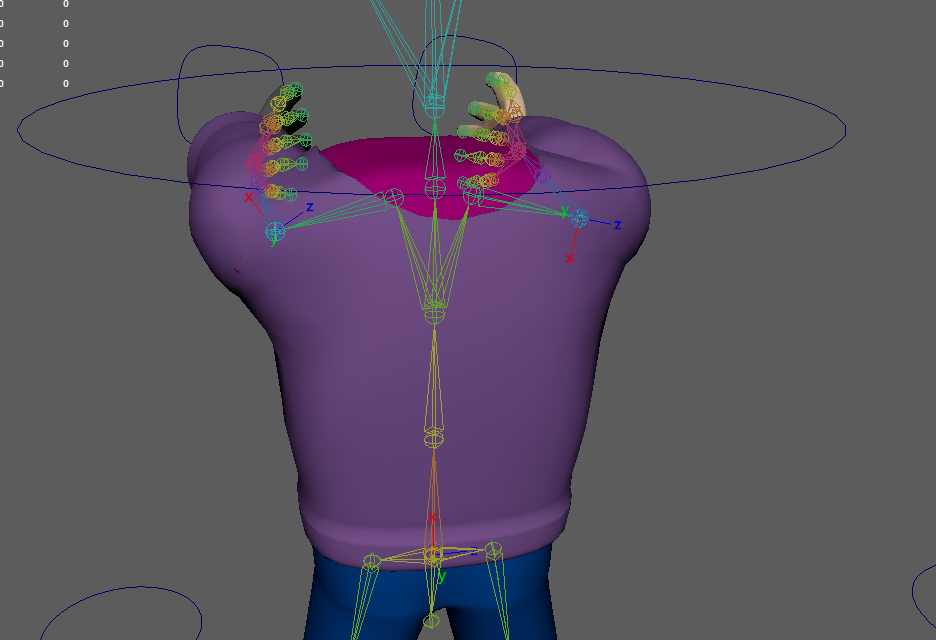
Granted, this part would have to be put on hold, since when moving the arms into various different positions, especially when preparing the arms into the position to begin adjusting the hands, since when moving them forward, the back of the model had quite a noticeable amount of clipping that needed to be addressed, with it being especially prominent around the left shoulder area.
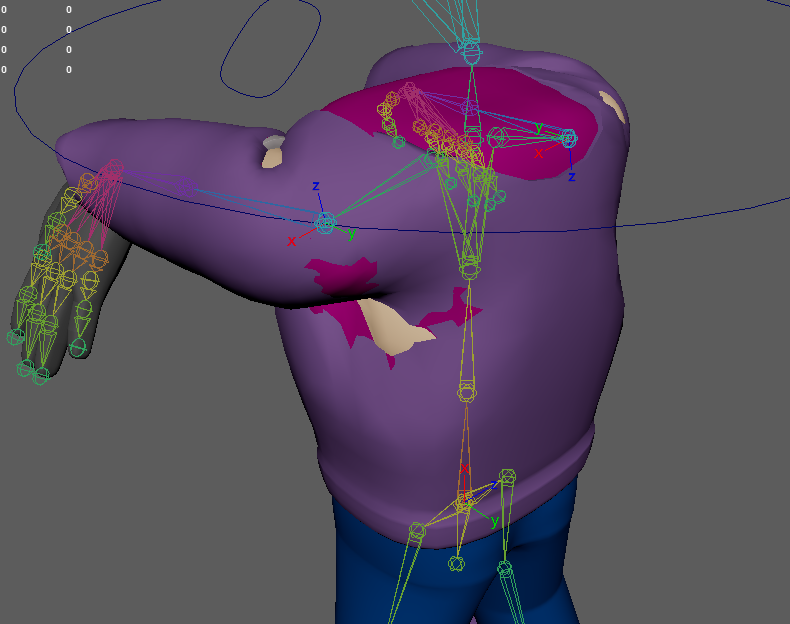
…Or so I thought until I realised it could’ve likely been caused to be pushing the model a bit too far than expected… Turns out this issue was due to the way that the shoulder joints were rotating when the wrist controls were moved in front of the models face, which caused a severe level of deformities around the armpit area.
This was fixed by adding in a control to each of the elbow’s that prevented them from suddenly snapping to a completely different orientation when moving them in front of Urti. This caused a substantial decrease in terms of clipping, which resolved that issue, and allowed me to continue work into other parts of the model.
With those issues fixed, I moved onto the legs, mainly to look and see how those joins were moving, and fix any potentially clipping that could happed in normal poses, putting the legs in various poses to replicated that kind of movement (for example if she was kneeling down, stretching her leg, etc). This was mostly present on the right leg, where parts of the cybernetics kept poking out of the leg when moving it in certain directions.
Whilst I wasn’t able to make it perfect in hiding every part of the cybernetics, I was able to severely reduce to clipping to minimal amounts around the right leg.
Though now would come the most tedious part of the weight painting process, the fingers. This was especially difficult, not only because each of them were so close together (making the whole process difficult to navigate between them). This part of the weight painting process took place over the course of several days and nights, due to the process requiring multiple takes in making sure each finger moved correctly and didn’t deform too much.)
This was also around the time when the idea for what I wanted to animate changed, so I was mainly focused on how the outside of the fingers moved, since I planned on having Urti holding a flashlight in her hands, as well as potentially interact with other objects depending on how much I am able to animate.
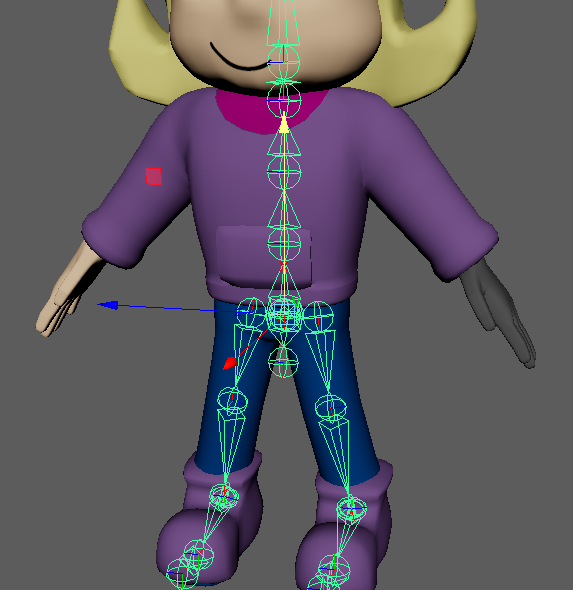
More controls were added around the chest and pelvis area, as to allow for more general movement and controls. A global control was also added to make it easier to move Urti around in general.
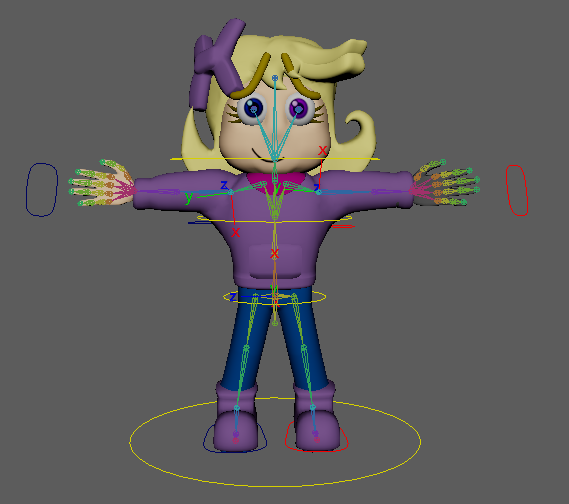
I began to play around and test the various handles to see how the model bends and moves, seeing if everything looked ok in motion.
Whilst I hadn’t set up anything in regards to blend shapes or the mouth & eye textures, I decided to give the model a quick animation test in attempting a basic walk cycle, which would be established and done in another blog, as to ensure that this one is not clogged with anything (since frankly, I think this one is definitely long enough).
That being said, I did create a flashlight asset that Urti would hold within the animation, being made by throwing together a modified cylinder and cone to represent the shape of one.
Reference List
Josh Petty (n.d.) What is 3D rigging for animation and character design? Available online: What is 3D Rigging For Animation & Character Design? (conceptartempire.com) [Accessed 06/02/2023]
Video Reference List
Doodley (2022) Animating ARMS (FK vs. IK) – Doodley [Video] Available Online – Animating ARMS (FK vs. IK) – Doodley – YouTube [Accessed 20/02/2023] Fig.01
SARKAMARI (2020) Character Rigging for Beginners: 01 Skeleton – SARKAMARI [Video] Available Online – Character Rigging for Beginners: 01 Skeleton – YouTube [Accessed 22/02/2023] Fig.02